Trachea
The trachea is the primary route of air for respiration as well as clearing secretions for the respiratory tract.
25-1 Tracheotomy
Introduction
A tracheotomy bypasses laryngeal pathology, permits easy clearing of secretions, and provides a safe route for prolonged assisted ventilation.
Indications
Tracheotomy is indicated when prolonged ventilation or tracheobronchial toilet is required, or when laryngeal pathology is not amenable to immediate correction.
Preoperative Evaluation
A preoperative chest radiograph is helpful in defining the preoperative condition of the lungs and to compare to postoperative films. A microlaryngoscopy and bronchoscopy may be valuable in excluding underlying treatable pathology before proceeding with a tracheotomy.
Operative Technique
1. If possible, tracheotomy should be performed with the patient intubated and under general anesthesia.
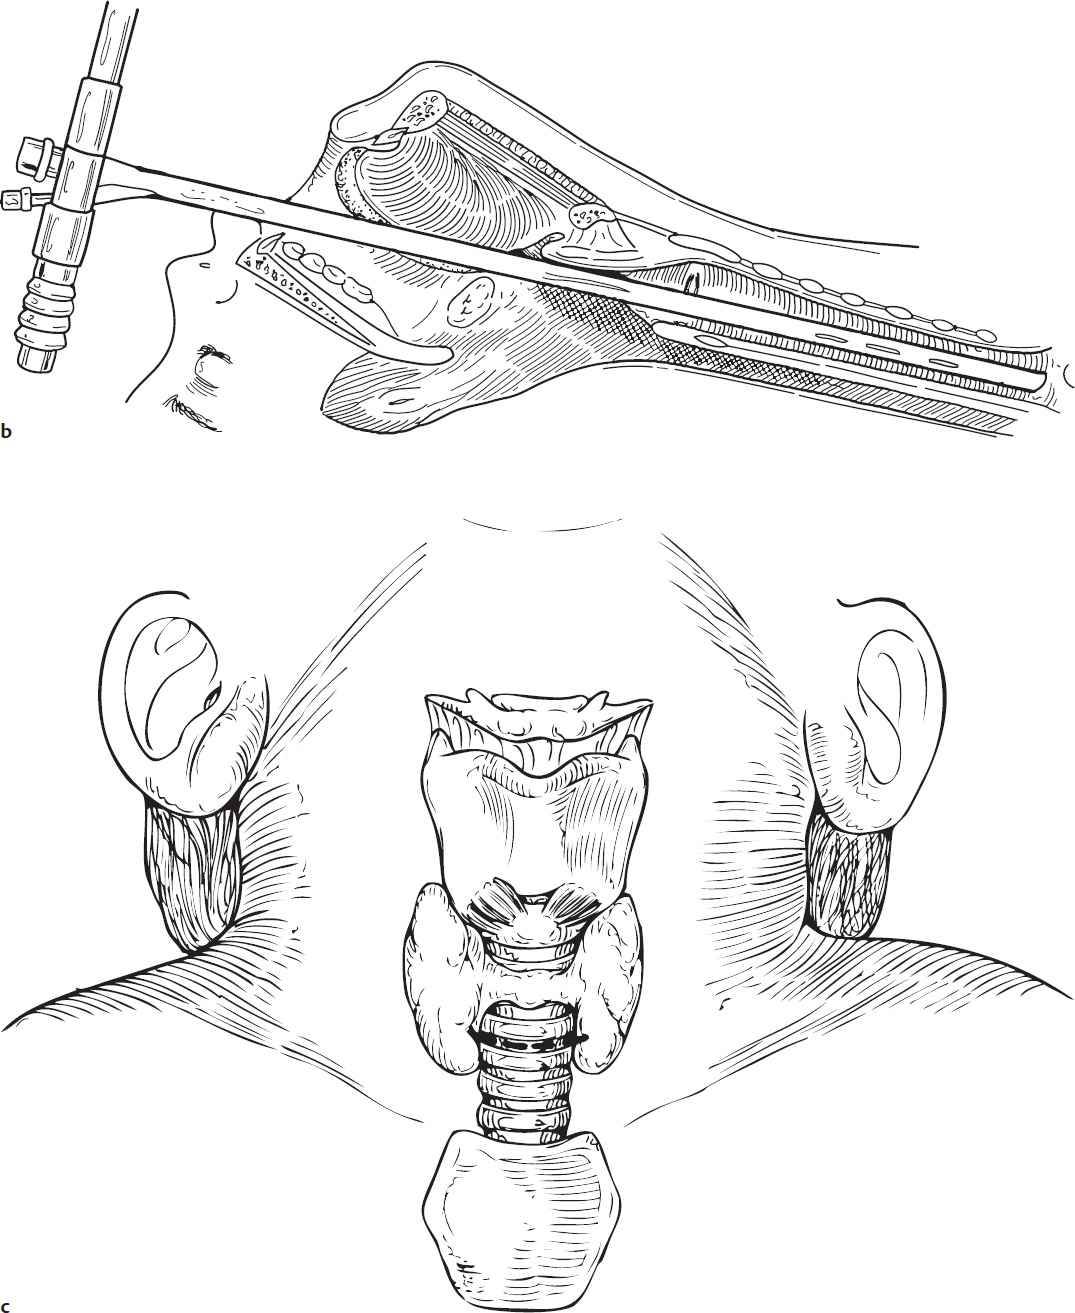
2. If a bronchoscope is preferred, it should be introduced after a satisfactory plane of anesthesia and relaxation is achieved (Fig. 25.1a,b,c).
3. Nasogastric tubes and esophageal stethoscopes are removed prior to positioning the patient to avoid firm objects in the neck that may be confused with the trachea during palpation.
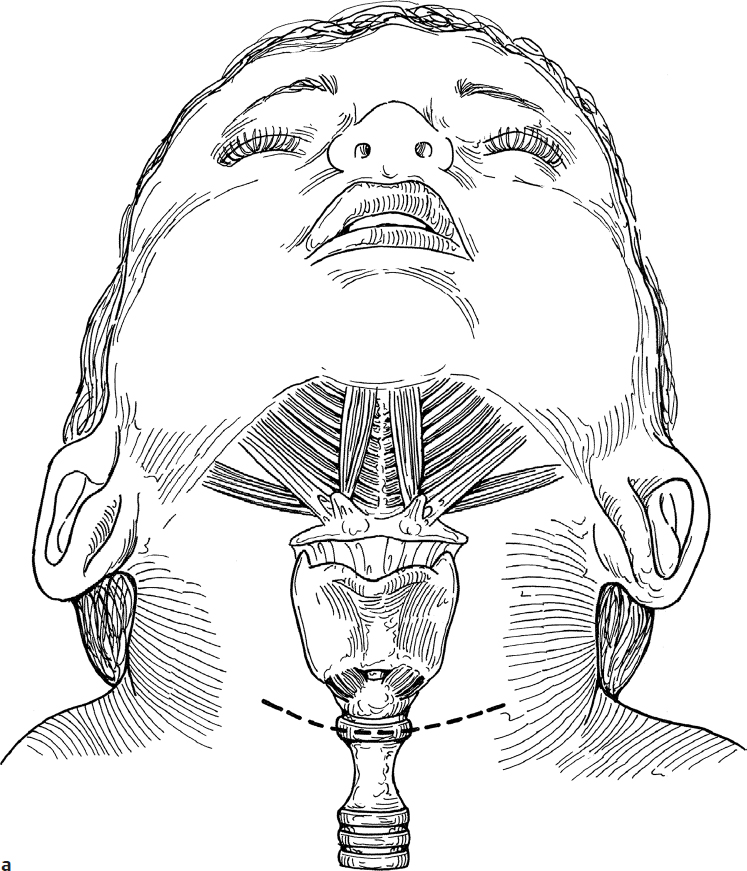
4. The child is positioned on a shoulder roll with the neck extended and the occiput stabilized.
5. One percent lidocaine with 1:100,000 epinephrine is injected subcutaneously at the site of the incision to aid in hemostasis.
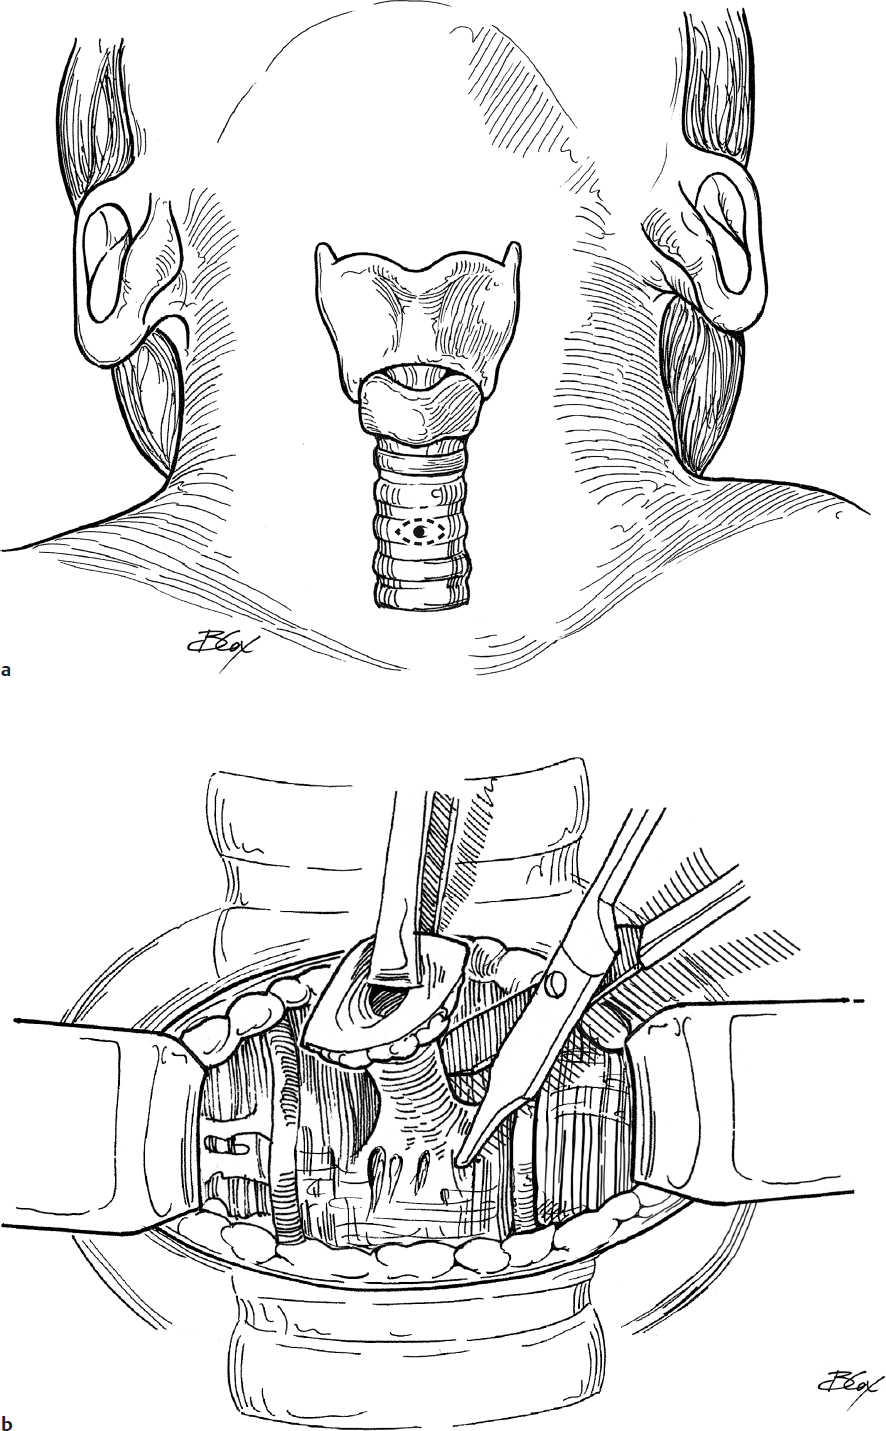
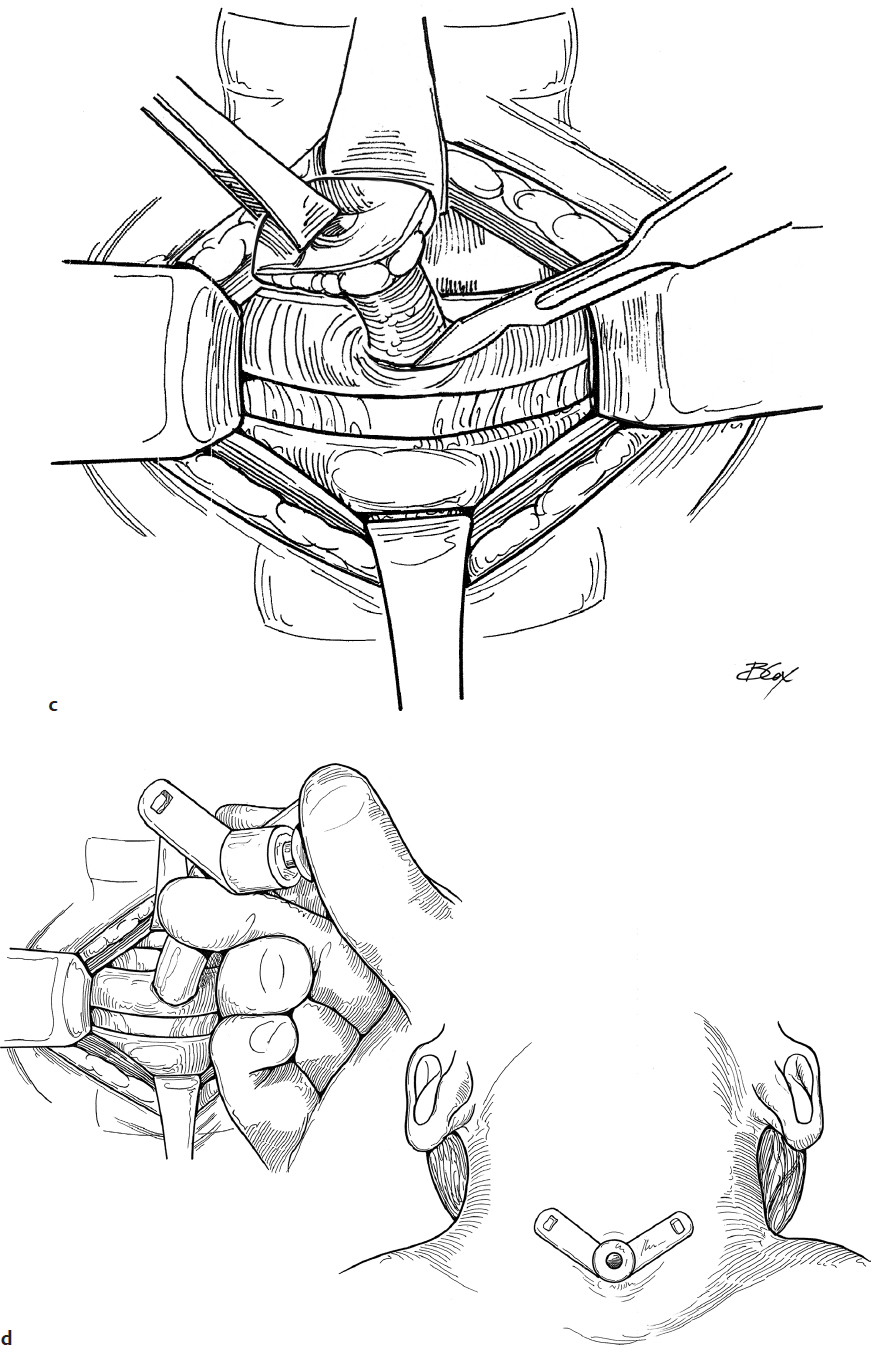
6. A horizontal skin incision is made halfway between the cricoid and the sternal notch (Fig. 25.1c).
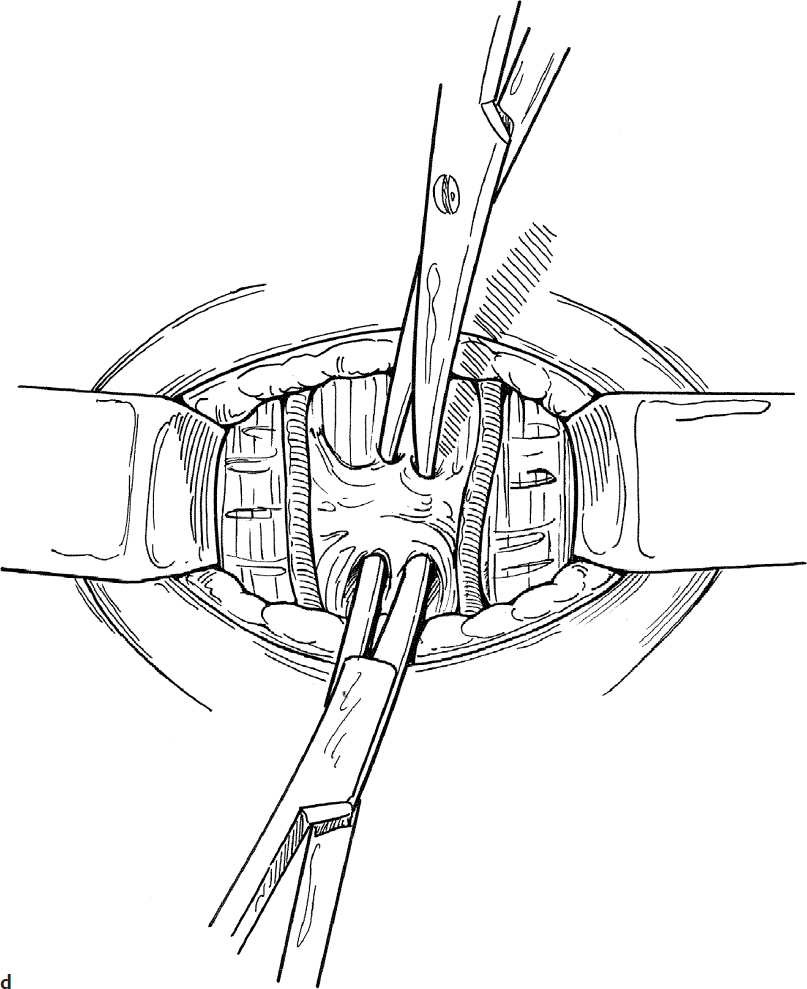
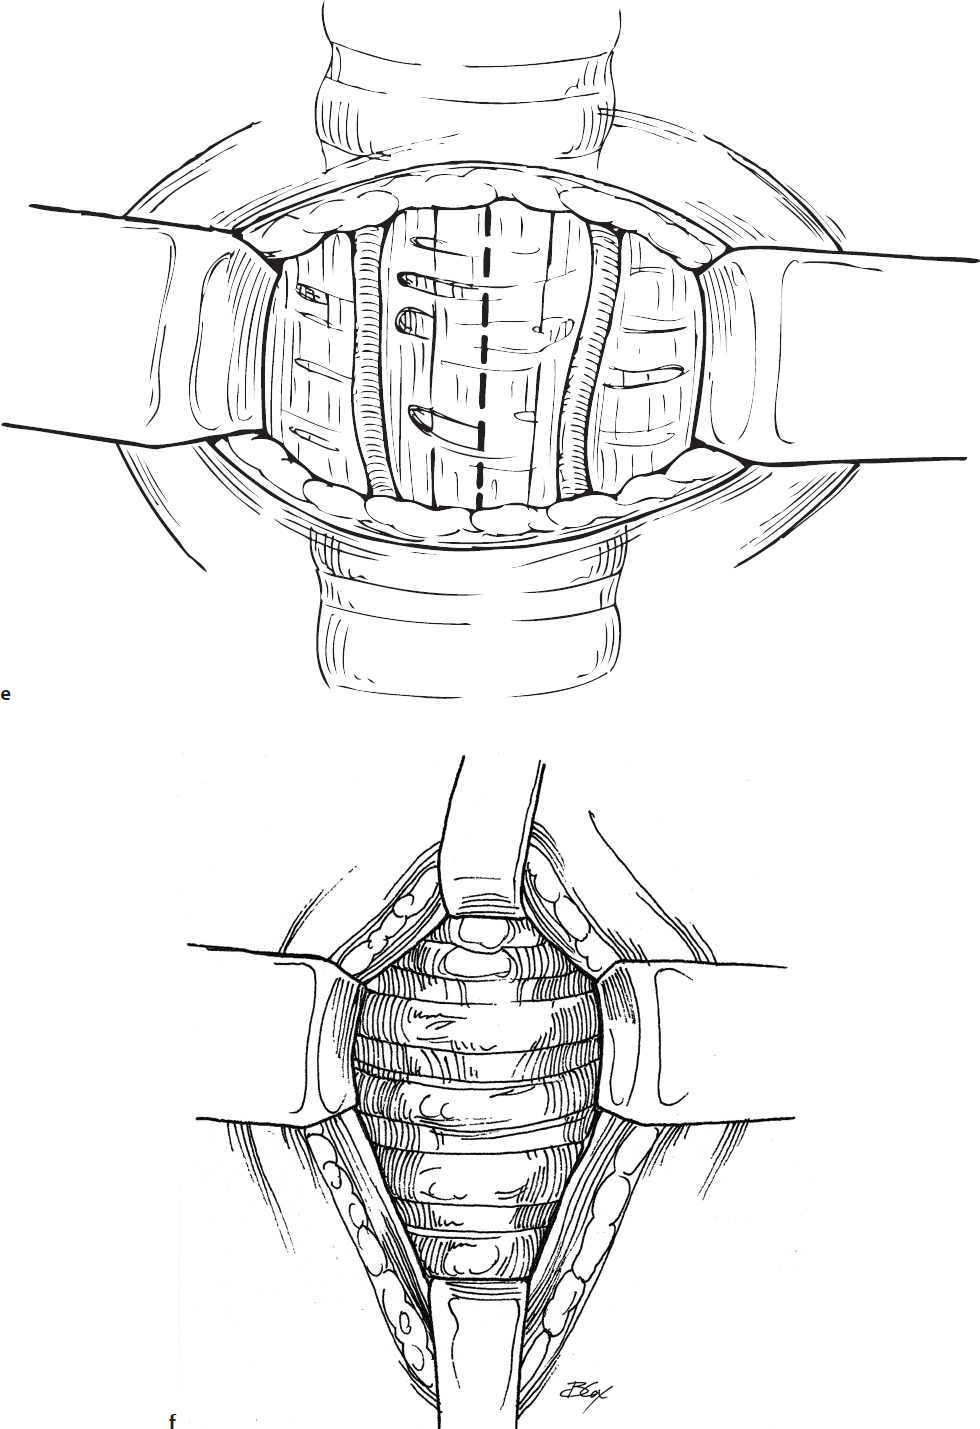
7. Subcutaneous fat and tissue are reflected with a clamp, exposing the deep cervical fascia overlying the strap muscles. Ribbon retractors are placed to expose the field and stabilize the trachea in the midline (Fig. 25.1d). In a younger child, the amount of subcuticular fat is considerable and should be excised prior to splitting the strap muscles.
8. Vertical dissection with a scissors or electrocautery and a clamp in the midline is carried out until the trachea is exposed (Fig. 25.1e).
9. Retractors are used to reflect the strap muscles and visualize the tracheal rings (Fig. 25.1f).
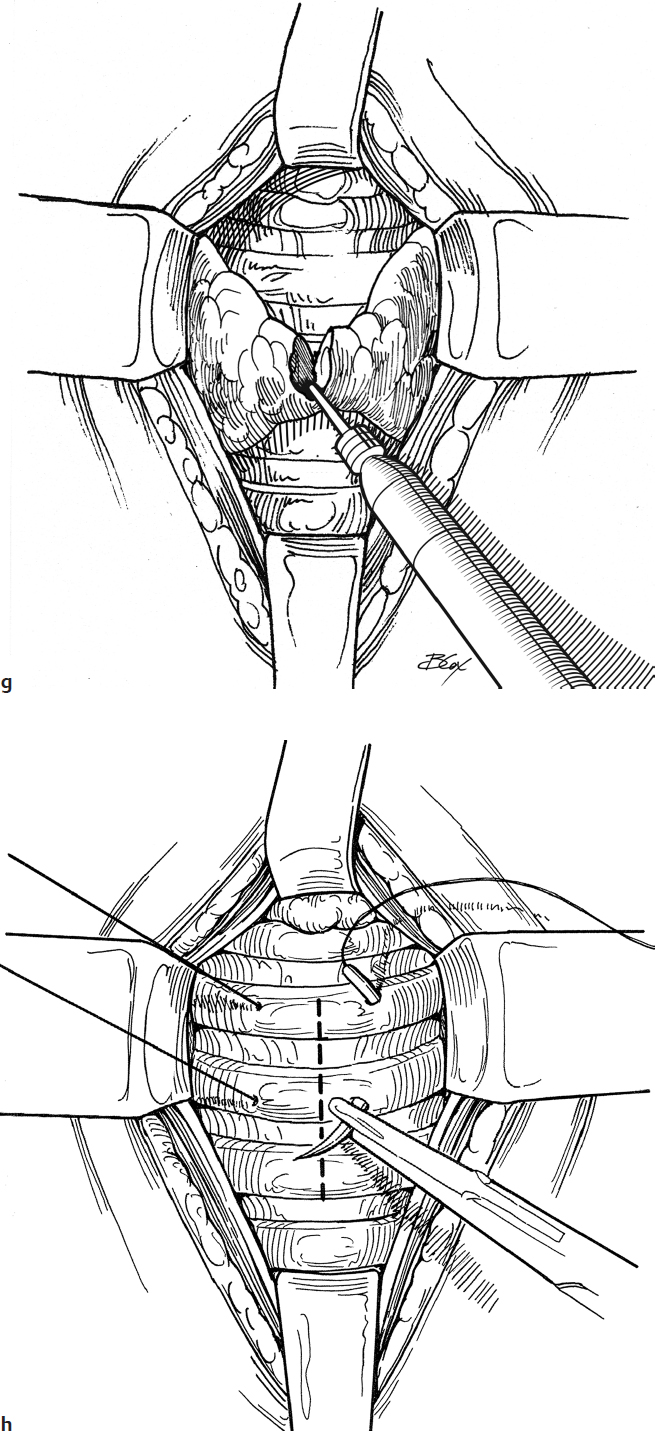
10. If the thyroid isthmus is encountered over the trachea, it may be reflected superiorly with a retractor or divided with a Bovie to provide better tracheal exposure (Fig. 25.1g).
11. Throughout the procedure, palpation of the trachea and laryngeal structures helps maintain the surgeon’s orientation.
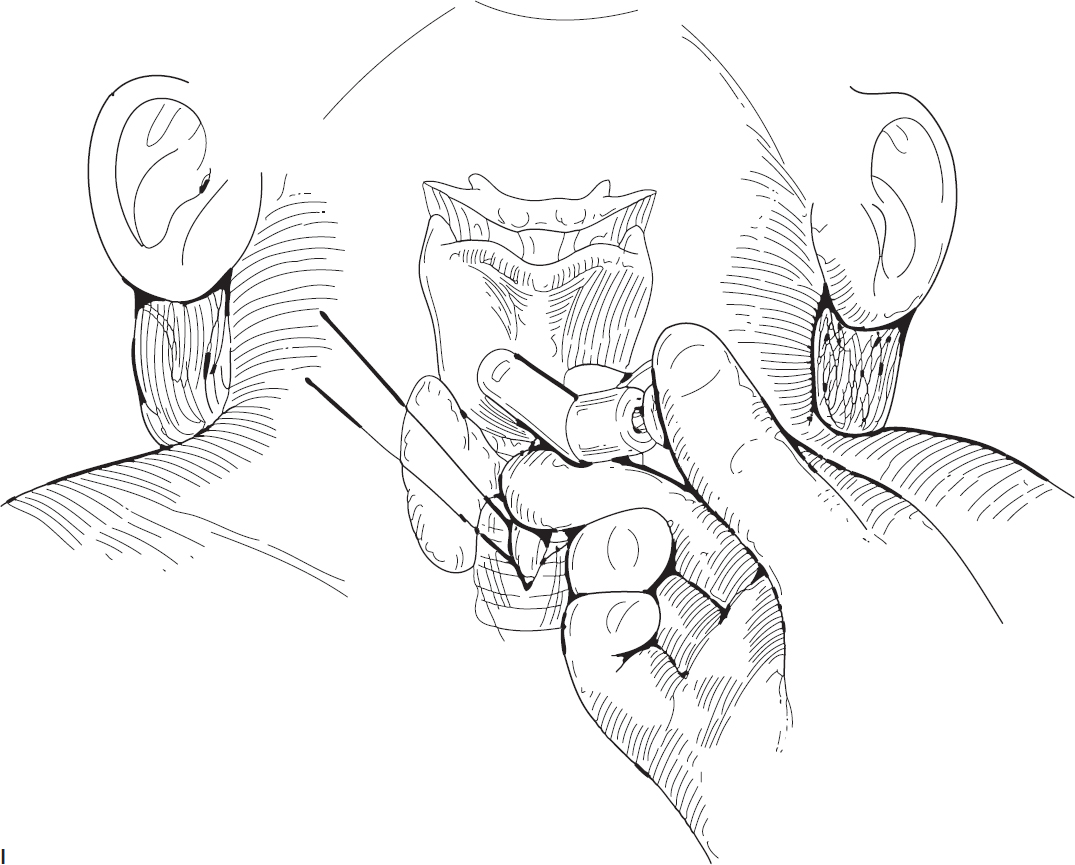
12. 4-0 nonabsorbable sutures are placed in the trachea on each side of the midline (Fig. 25.1h). These sutures are placed securely through the cartilage rings and are used for traction to expose the trachea should accidental decannulation occur before the tract is established.
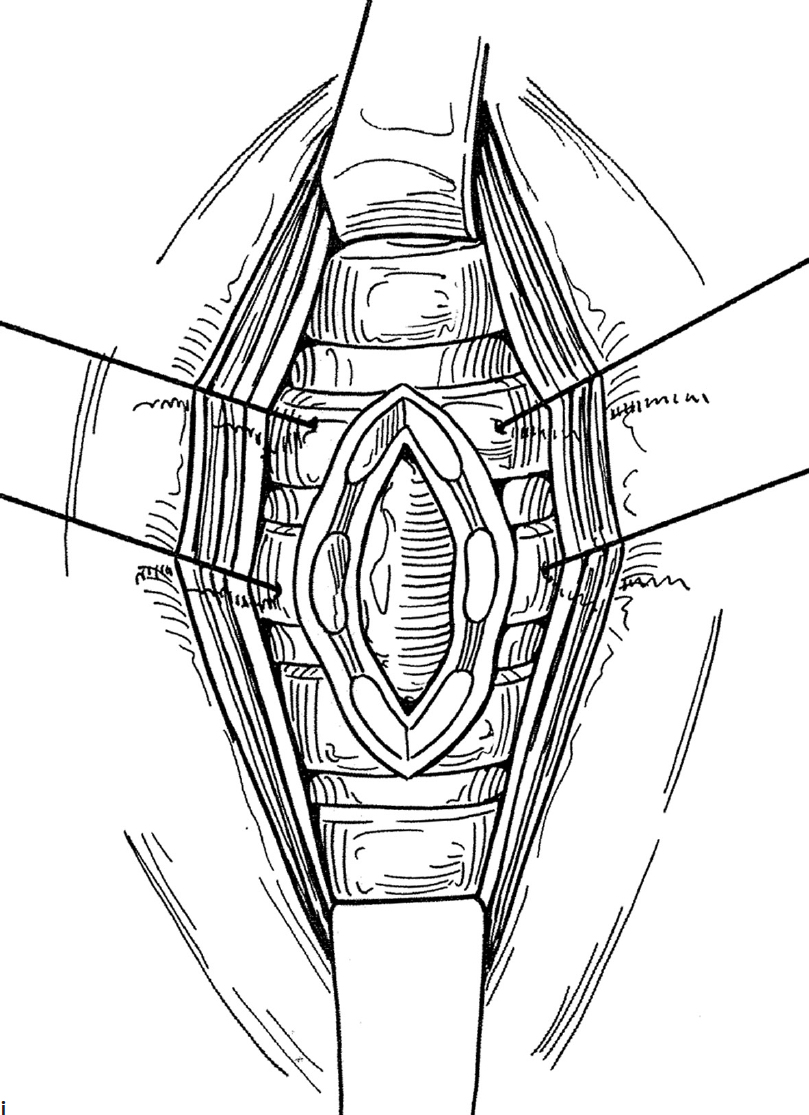
13. The lateral retractors are removed, and the trachea is elevated by traction on the stay sutures. A midline incision is made through two or three cartilage rings (typically between rings three to five), opening the trachea (Fig. 25.1i). The bronchoscope or endotracheal tube can be seen in the tracheal lumen.
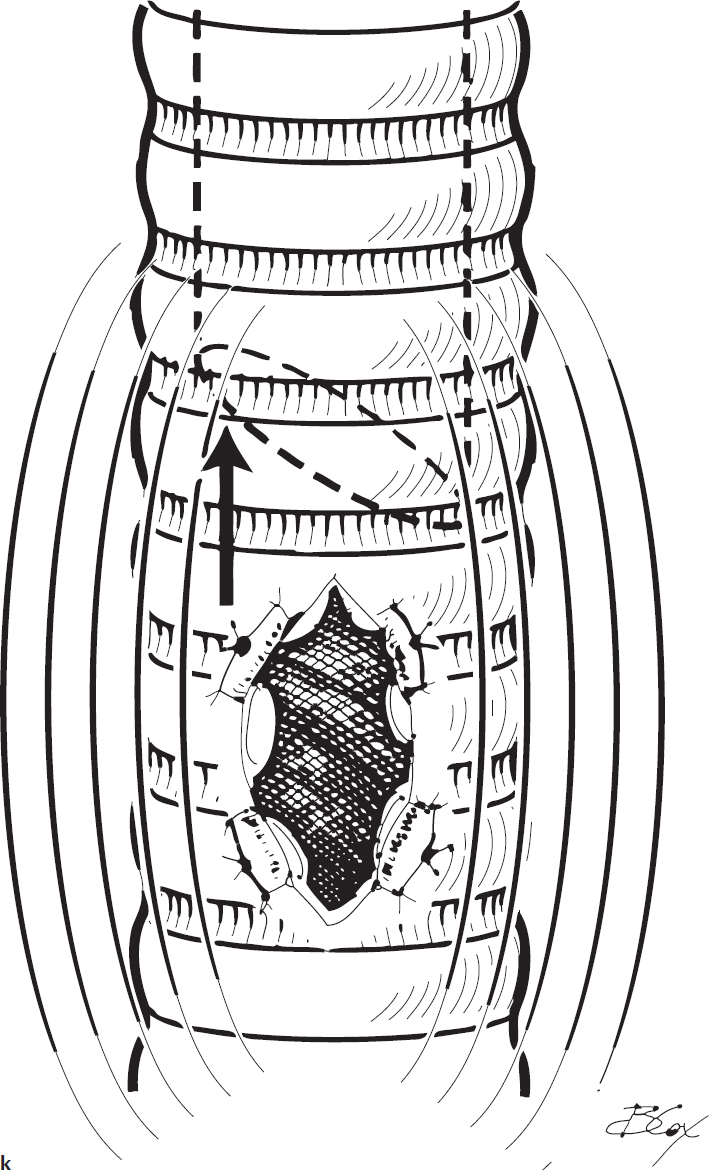
14. The skin flaps are sutured to the edges of the tracheotomy using a horizontal mattress stitch for safety in the event of accidental decannulation (Fig. 25.1j,k). The two distal sutures are key, and should eliminate the dead space between the skin and the trachea, minimizing the risk of a false passage should the tracheal tube be displaced before the stoma has matured. This step is not universally performed at all institutions.
15. The endotracheal tube or bronchoscope is withdrawn to just above the tracheal incision (Fig. 25.1k).
16. A suitably sized, age-appropriate tracheostomy tube is inserted in the trachea (Fig. 25.1l). In infants younger than 9 months of age, a neonatal tube is generally used.
17. After satisfactory ventilation is established through the tracheotomy tube, the endotracheal tube or bronchoscope is removed.
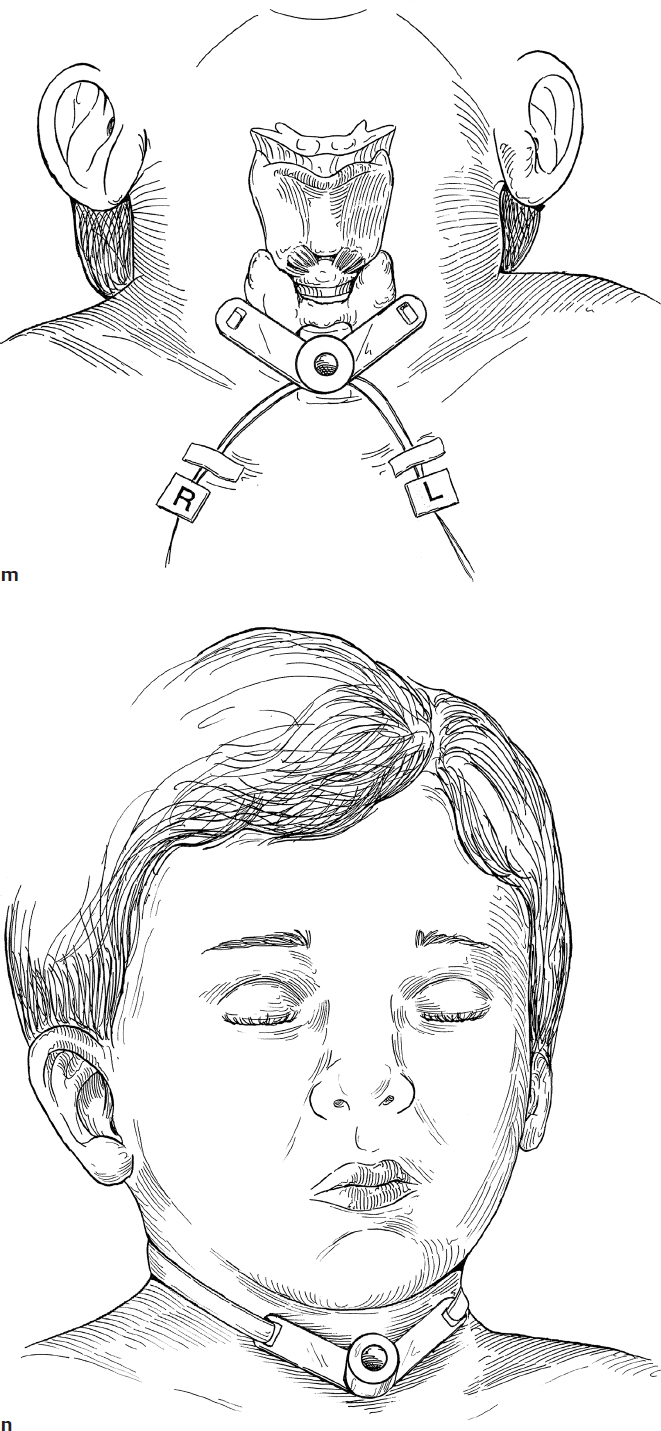
18. The stay sutures are clearly labeled for identification and taped to their respective side of the chest for use if accidental decannulation occurs (Fig. 25.1m).
19. The tracheotomy tube is securely tied in place with tracheostomy tape while the head is in the neutral position (Fig. 25.1n).
20. A flexible endoscope is passed through the tracheostomy tube lumen to confirm position of tube above the carina.
21. A postoperative anteroposterior (AP) chest radiograph is obtained to determine the position of the tip of the tube near the carina and to check for pneumothorax.
Complications
1. Hemorrhage
2. Pneumothorax
3. Subcutaneous emphysema
4. Formation of granuloma
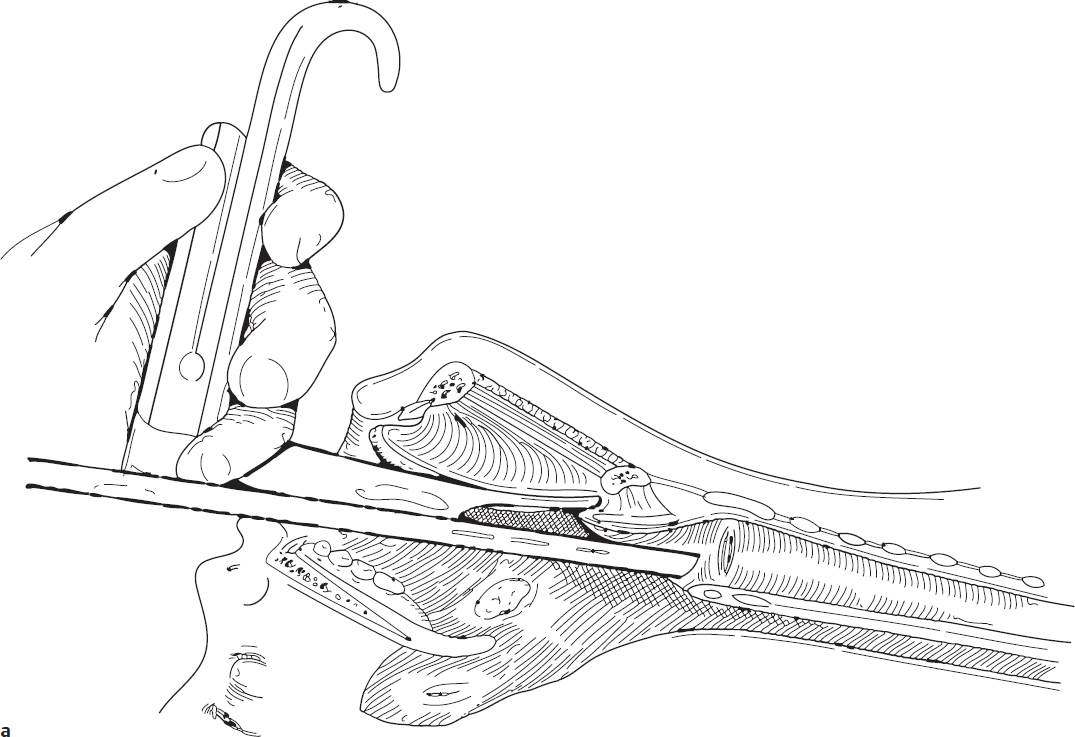
Fig. 25.1a

25-2 Tracheocutaneous Fistula Closure
Introduction
A tracheocutaneous fistula (TCF) may persist following removal of a tracheostomy tube. If it persists, it may permit aspiration of water while bathing or swimming. It may also be a nuisance, allowing mucus to exit the neck during coughing. TCF closure is designed to close the fistula with a low-risk technique, not as a scar revision.
Indications
TCF closure is indicated when the fistula has persisted for 1 year after decannulation, or earlier, if the likelihood of spontaneous closure is low.
Preoperative Evaluation
Direct laryngoscopy and bronchoscopy are necessary to be certain that no significant tracheal stenosis is present at or above the stoma. Closure of the stoma under these conditions could precipitate the need for reinserting the tracheotomy.
Operative Technique
1. TCF closure is performed under general anesthesia with an endotracheal tube that is a half size smaller than age appropriate.
2. One percent lidocaine with 1:100,000 epinephrine is injected in the area of the proposed excision to aid in hemostasis. An elliptical incision with very narrow margins encompassing the fistula is made using a no. 15 blade scalpel (Fig. 25.2a).
3. The TCF tract is dissected free from the surrounding skin down to the trachea. The tract is then amputated at the level of the tracheal cartilage (Fig. 25.2b,c).
4. To minimize the risk of subcutaneous emphysema, a small (2.5 or 3.0) tracheotomy tube is inserted into the opening in the trachea (Fig. 25.2d).
5. The tracheotomy tube is removed in the recovery room or intensive care unit (ICU) once the patient is completely awake. The wound is left to heal by secondary intention.
Complications
1. Subcutaneous emphysema
2. Pneumothorax
3. Respiratory distress
4. Formation of a granuloma
25-3 Tracheal Stenosis—End-to-End Anastomosis
Introduction
Resection of a portion of the cervical trachea with an end-to-end anastomosis is a useful technique in the armamentarium for repair of tracheal stenosis.
Indications
Resection of a segment of trachea with end-to-end anastomosis is indicated for severe tracheal stenosis that involves no more than one-third of the cervical trachea. An alternative technique is to perform a cervical slide tracheoplasty.
Preoperative Evaluation
Standard radiography may be helpful; however, a computed tomography (CT) scan or magnetic resonance imaging (MRI) of the tracheobronchial tree clearly outlines the length and shape of the stenosis. Direct laryngoscopy and bronchoscopy are essential to examine the intraluminal configuration.
Operative Technique
1. Tracheal resection is performed under general endotracheal anesthesia. If the child has a tracheotomy tube in place, the tube is removed and a cuffed, armored endotracheal tube is placed in the stoma.
2. The patient is placed on a shoulder roll with the neck extended as for tracheotomy.
3. One percent lidocaine with 1:100,000 epinephrine is injected subcutaneously at the site of the incision to aid in hemostasis.
4. A transverse incision is made in the neck overlying the area of tracheal stenosis (Fig. 25.3a).
5. The incision is carried through the subcutaneous tissues and deep cervical fascia, exposing the strap muscles. Superior and inferior subplatysmal skin flaps are created.
6. The strap muscles are divided in the midline and retracted laterally with 4-0 silk sutures (Fig. 25.3b).
7. The pretracheal fascia is then incised with a scissors and reflected laterally, exposing the trachea above and below the tracheal stenosis (Fig. 25.3c).
8. A vertical incision is made in the midline of the trachea through the stenotic segment, identifying the limits of the stenosis (Fig. 25.3d).
9. 3-0 Prolene (Ethicon) retention sutures are placed along the lateral distal trachea (bilaterally) to prevent retraction of the trachea (Fig. 25.3e). The endotracheal tube is pulled back to a level above the stenosis, and the lower segment of the trachea is intubated with a cuffed reinforced endotracheal tube as for laryngotracheal reconstruction (Fig. 25.3f).
10. The trachea is transected with a knife above the stenosis at the lower border of a normal tracheal ring (Fig. 25.3g). The incision includes the posterior tracheal wall, but the integrity of the esophagus is preserved (Fig. 25.3h). Care is taken to avoid injury to the recurrent laryngeal nerves.
11. The trachea is dissected away from the esophagus along the party wall with a scissors (Fig. 25.3i).
12. When the stenotic segment has been separated from the esophagus, the lower portion of the trachea is transected and the stenotic segment is removed (Fig. 25.3j).
13. If the anastomosis is under tension, the larynx may be released from its suprahyoid attachments.
14. A transverse incision is made just above the hyoid bone with cautery, releasing the geniohyoid and hyoglossal muscles from the hyoid bone (Fig. 25.3k).
15. The hyoid bone can be divided at the insertion of the lesser cornu, which is the site of attachment of the digastric muscle (Fig. 25.3l). This releases the larynx, allowing it to move inferiorly.
16. The inferior trachea is released by carefully dissecting anterior and posterior to the trachea while maintaining a lateral blood supply.
17. A running continuous suture technique using a double-armed 4.0 polydioxanone suture (PDS) is used to complete the anastomosis from posterodistally to anteroproximally (Fig. 25.3m). The suture is placed to allow the final knot to be extraluminal (Fig. 25.3n).
18. Prior to completing the anterior aspect of the anastomosis, the reinforced endotracheal tube is removed and the patient is reintubated from above with an age-appropriate endotracheal tube.
19. Typically, two or three additional tension-releasing sutures are placed, encompassing two tracheal rings above and two below the anastomosis (Fig. 25.3o).
20. A Penrose drain is placed in the wound, and the strap muscles are reapproximated over the trachea (Fig. 25.3p).
21. The subcutaneous tissues are closed with 3-0 interrupted Vicryl (Ethicon) suture and the skin is closed with 5-0 running subcuticular Monocryl (Ethicon) suture.
22. Two sutures are placed from the skin of the chin to the skin of the chest with 0-Prolene to keep the neck from extending (Fig. 25.3q). If the anastomosis is not under undue tension, an alternative is a cervical collar.
23. The endotracheal tube is removed in 12 to 24 hours. In older patients, extubation in the operating room at the conclusion of the case may be considered.
24. The drain is left in place for 2 to 3 days.
25. Antibiotics are administered while the drain remains in place.
26. Ten days after the procedure, the chin to chest sutures or cervical collar are removed and direct laryngoscopy and bronchoscopy are performed under general anesthesia. If present, granulation tissue is removed.
Complications
1. Restenosis
2. Pneumothorax
3. Vocal fold paralysis
4. Esophageal perforation