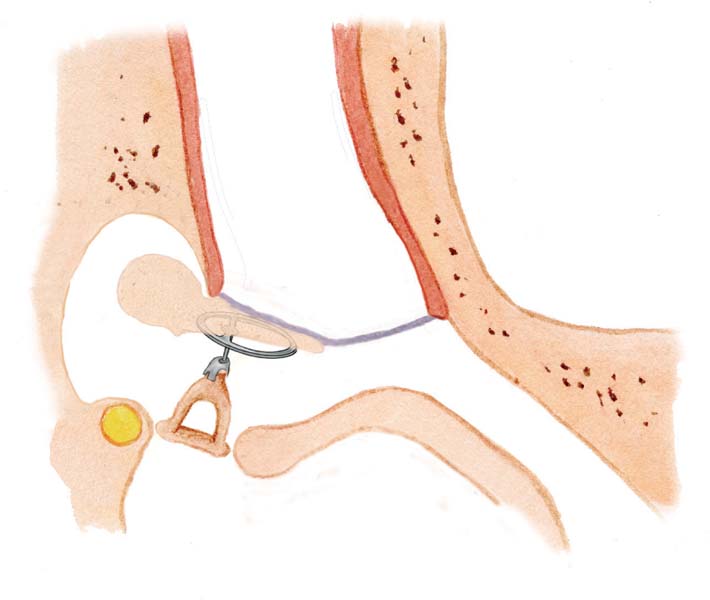
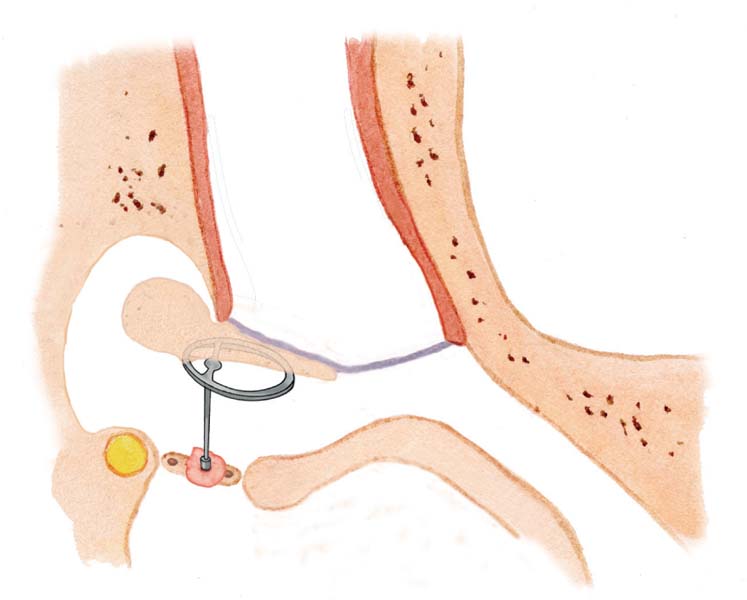
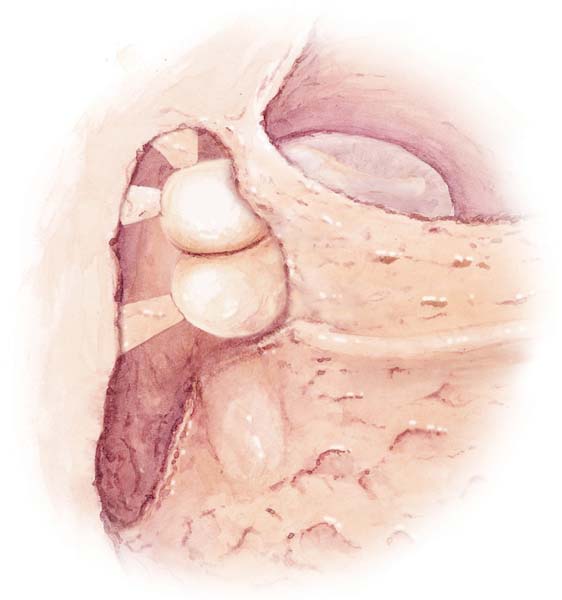
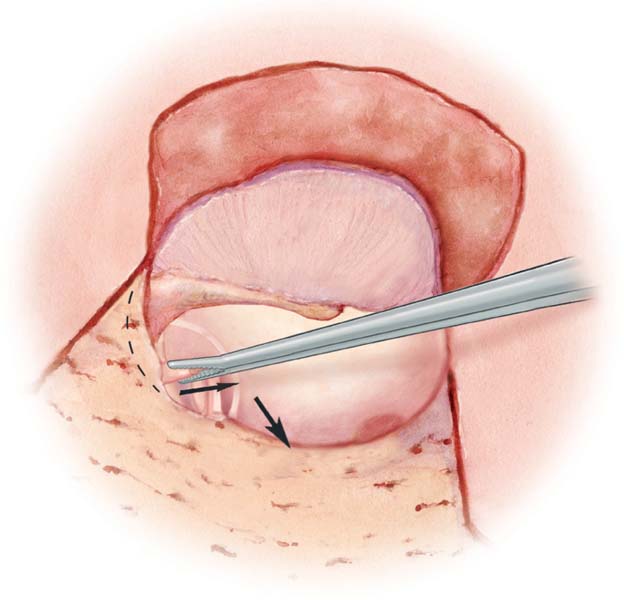
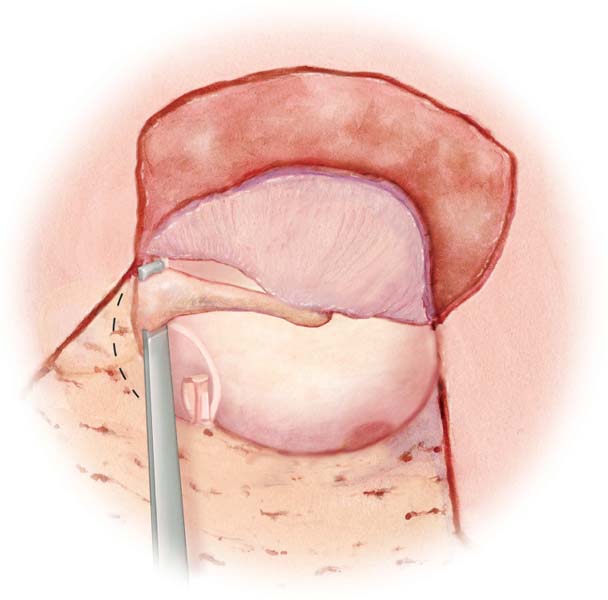
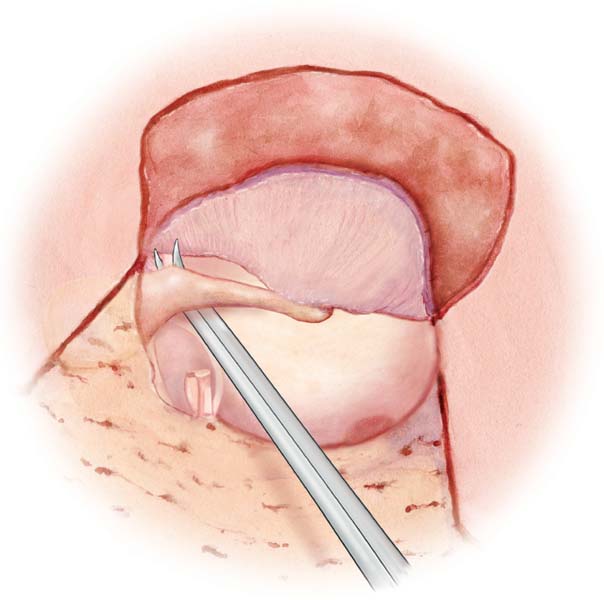
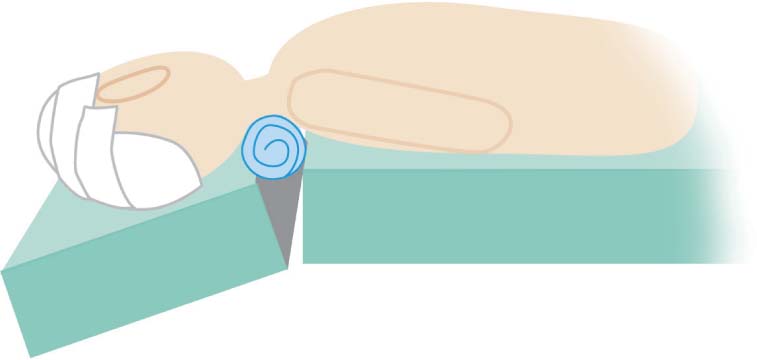
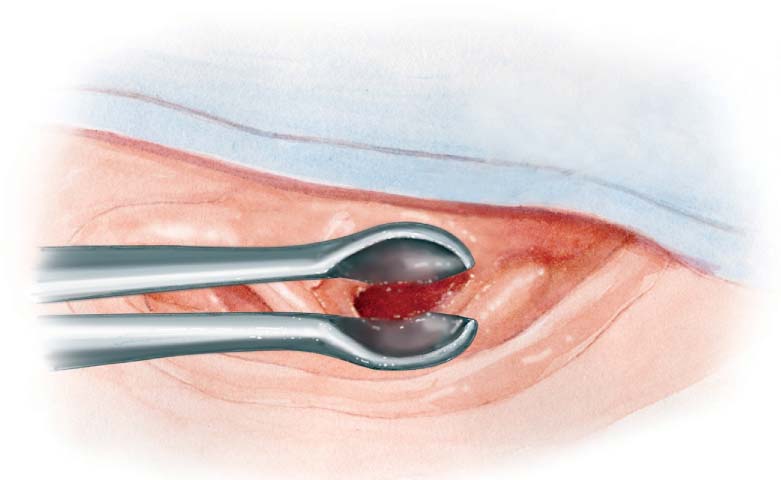
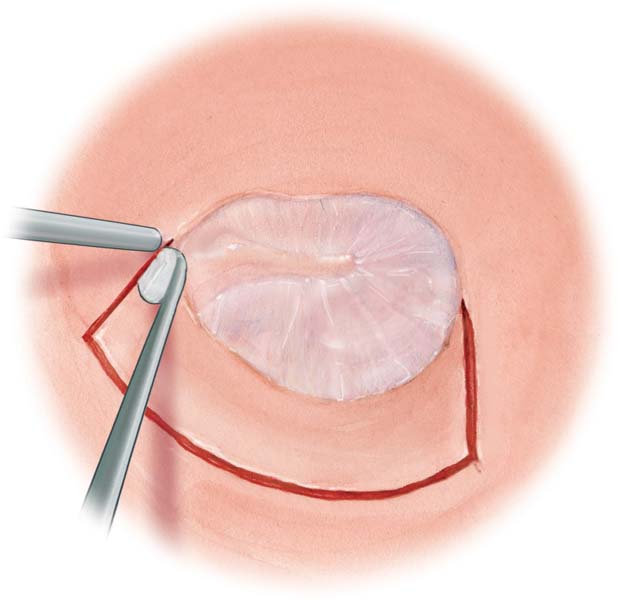
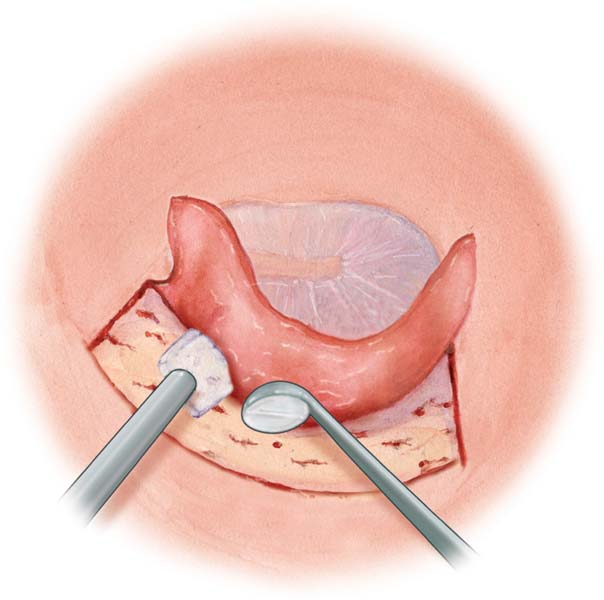
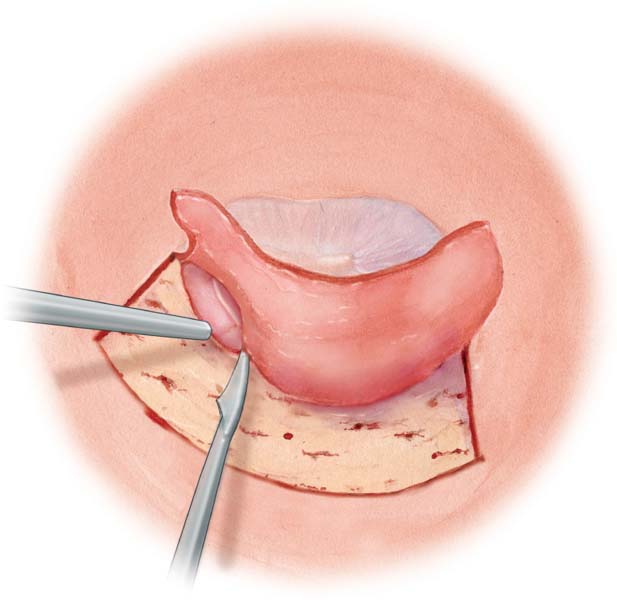
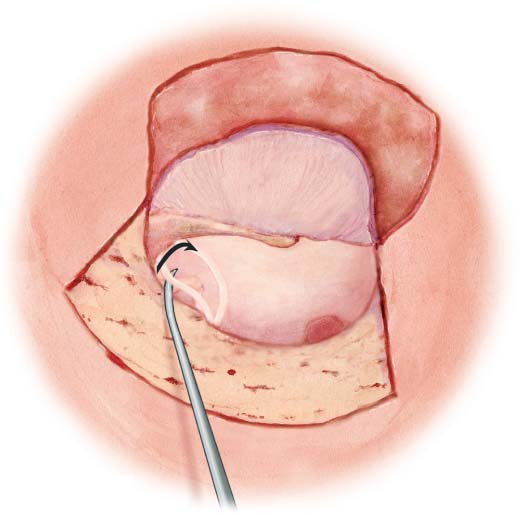
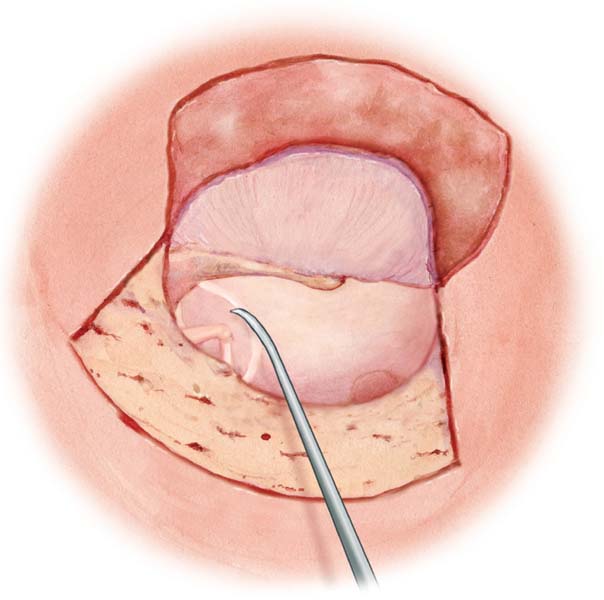
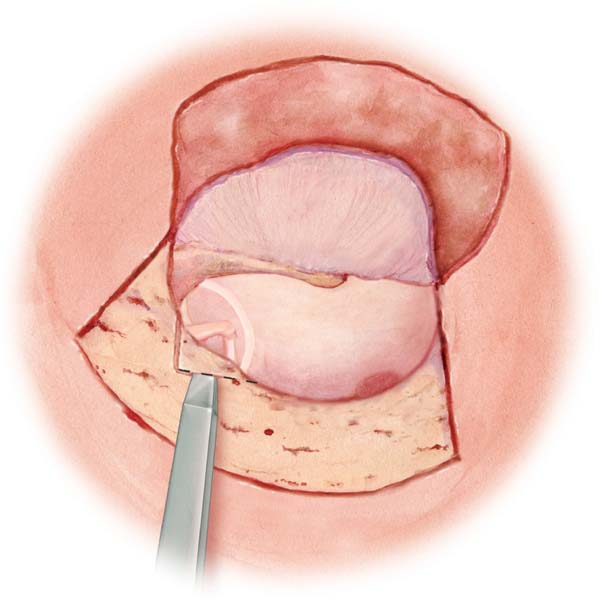
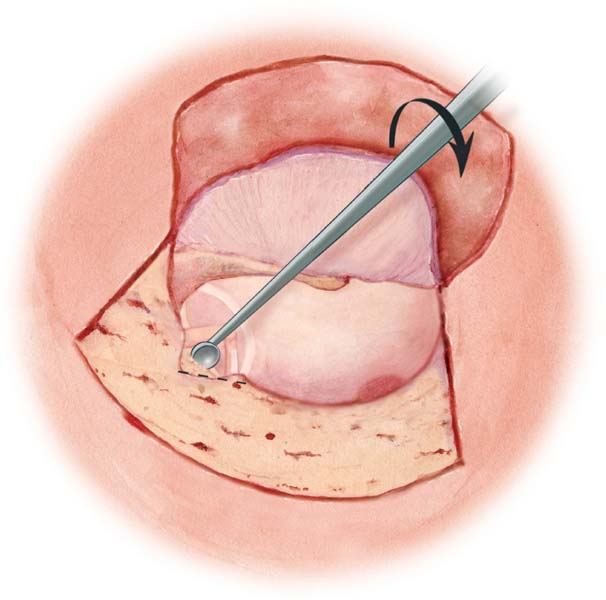
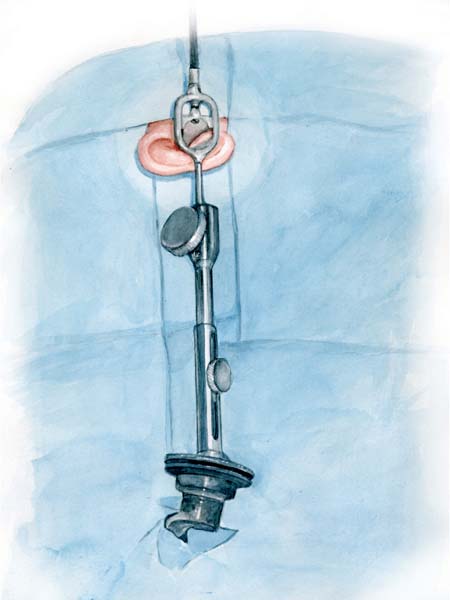
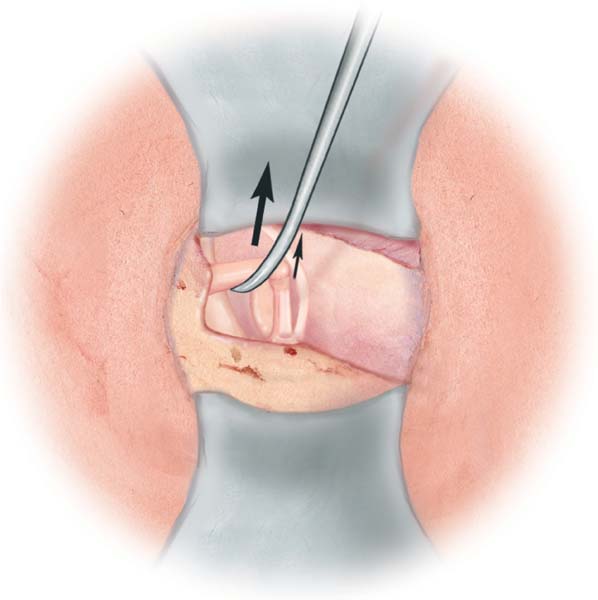
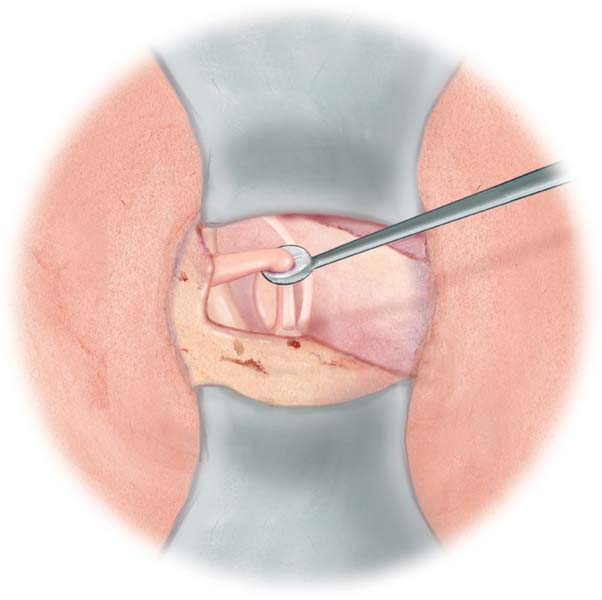
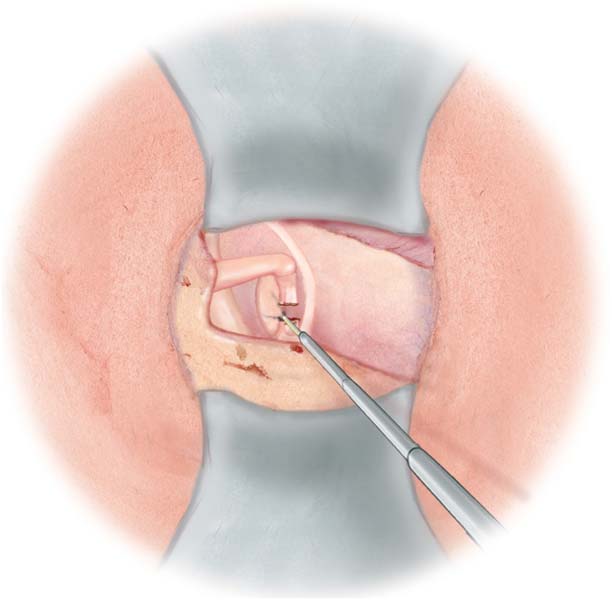
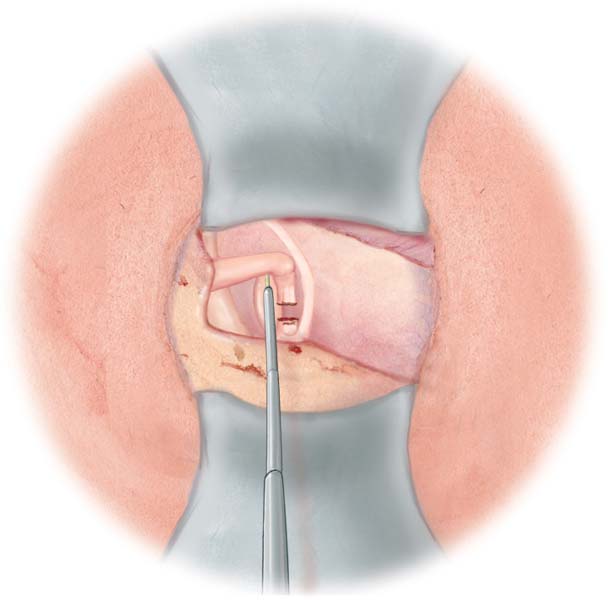
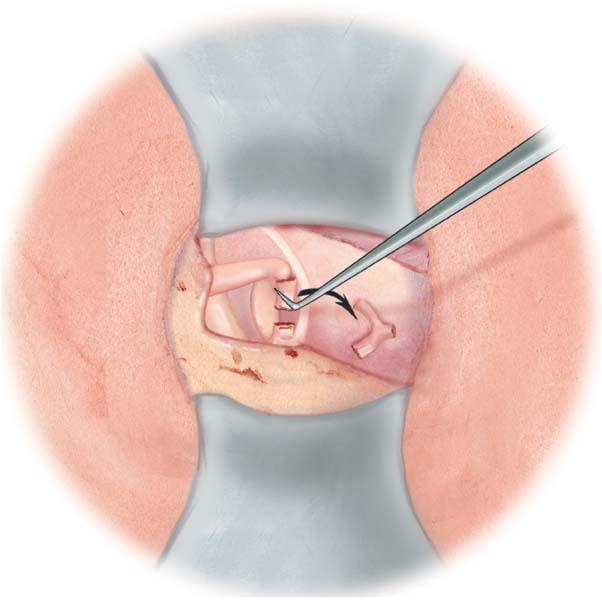
5 Stapes Fixation in Tympanosclerosis Stapes Fixation in Otosclerosis Disarticulation of the Intact Chain Minor Disruption or Discontinuity of the Incudostapedial Joint Major Discontinuity of the Incudostapedial Joint (Stapes Useful) Major Discontinuity of the Incudostapedial Joint (Redundant Stapes Superstructure) Any procedure of the tympanic cavity or middle ear with the conservation of an intact chain and tympanic membrane reconstruction. Fig. 5.1 Any ossiculoplasty involving the stapes with a columella effect from the stapes to the malleus handle or eardrum (intact or reconstructed). Fig. 5.2 Reconstruction in case of an absent or severely defective stapes. The columella extends from the footplate to the malleus handle or eardrum (intact or reconstructed). Fig. 5.3 Platinotomy for a fixed footplate and no ossicles (except malleus). The eardrum must be intact. Fig. 5.4 The incus or malleus can be fixed in the epitympanic region. Fig. 5.5 The fixation approach usually involves posterior epitympanotomy (see Posterior Epitympanotomy, p. 119). It requires careful drilling with a diamond burr on the approach to the short process of the incus. If the incudomallear complex is not visible enough and safe access not guaranteed, the incus is removed by the transcanal route. After dislocation of the incudostapedial joint with a small round knife or microhook, the incus is lateralized using a small hook. The long process of the incus is grasped with microforceps (see Removal of the Incus, p. 90). Small anteroposterior movements allow the incudomallear joint to be freed, before the incus is pulled inferiorly and removed. Fig. 5.6 If the malleus remains fixed, the malleus head must be removed using a malleus head nipper before type 2 ossiculoplasty is performed (see also pp. 92–97). Fig. 5.7 If malleus handle movement is still compromised, the malleus tendon may be calcified and should be cut using curved or straight microscissors. If there is sufficient exposure, the bony fixation of the incus or malleus head can be drilled using a very thin diamond burr. Adequate space should be created between the ossicle and bony wall to avoid recurrence of fixation. A Silastic sheet may be inserted in between. Fig. 5.8 The stapes may be fixed by tympanosclerotic plaques. The tympanic membrane must be intact to manage stapes immobility. Tympanosclerotic plaques can be carefully removed using a needle or small hook. Stapes mobility can be restored, but refixation frequently occurs. Generally, the superstructure should be removed using a laser or microscissors. The footplate is cleaned of the tympanosclerosis with a needle or small hook, moving parallel to the facial nerve in an anteroposterior direction. Footplate mobility is thus restored and an ossiculoplasty is performed. If the footplate remains fixed, a stapedotomy is performed. Tip: The hearing and pathological status of the contralateral ear and bone conduction of the operated ear has to be considered before a stapedotomy is performed. Inner ear damage is more frequent with tympanosclerosis than with otosclerosis. Classic or specific implantable hearing aids can be a safe alternative (e. g., the Vibrant Sound-bridge [Med-el, Innsbruck, Austria] plugged into the round window). In our experience, a transcanal approach is used in 98 % of all surgical procedures. In the case of a very narrow external auditory canal or second-stage surgery for stapedial tympanosclerosis, however, a retroauricular approach is required. The position of the patient’s head and local anesthesia are very important to obtain an optimal view of the oval window and reduce bleeding (see Local Anesthesia, p. 8, and Surgical Field, p. 9). Fig. 5.9 A short nasal speculum is used until work is started on the ossicular chain. The disinfection liquid is aspirated completely and the canal is washed out with water. Fig. 5.10 Tip: The advantages of the nasal speculum are that it makes it easy to change the operative field of vision and adapts to all canal diameters. The procedure starts with a Rosen incision, a curved incision from 12 o’clock to 6 o’clock. A lateral incision is first made inferiorly at 6 o’clock, then superiorly at 12 o’clock, using a lateral knife. The superior incision must be at least 8–10 mm long and the inferior incision 6–8 mm. A circumferential incision joins the lateral incisions in a curve. Fig. 5.11 The skin flap is elevated toward the fibrous annulus using a small, round knife. Because of the skin thickness, and to preserve smooth edges, it is sometimes necessary to complete the superolateral incision using straight microscissors. Microsuction is performed with a small cotton ball or piece of Merocel soaked in 1 % lidocaine with 5 µg/mL epinephrine to protect the skin and reduce bleeding. Fig. 5.12 A needle or sickle knife is inserted between the chordal eminence and short process of malleus, and the tympanic membrane is elevated. Then, using a lateral knife, the fibrous annulus is dislocated out of the sulcus starting at the transition of the chordal eminence, paying special attention to the chorda tympani. The middle ear mucosa must be incised to enter the middle ear cavity. When the opening is large enough, a flap knife or dissector-elevator is inserted and the fibrous annulus is luxated until an adequate view of the malleus neck and the round window is achieved. Fig. 5.13 If the chorda tympani compromises access to the stapes and oval window, the nerve must be disinserted from its bony well using a needle or microhook. Fig. 5.14 The chorda tympani is pushed medially without being stretched Fig. 5.15 Tip: In some cases, it is necessary to perform a small posterior atticotomy prior to chorda tympani luxation with a small curette. If it is not possible to push the chorda tympani medially, it can be pushed posteriorly. This step is sometimes performed after atticotomy. Tympanoatticotomy is performed using a 3-mm chisel. The bone is fractured perpendicularly and tangentially to the frame. Fig. 5.16 The atticotomy is completed with a curette to expose two-thirds of the long process of the incus, the facial nerve above the oval window, the oval window itself, the posterior crus of the stapes, and the stapedial tendon and pyramidal eminence. The curette is applied using posterior and inferior rotation movements. Fig. 5.17 Placement of a Portmann retractor allows a bimanual technique to be used. An adequate view of the structures previously described is vital. To this end, the atticotomy must be sufficiently large, rotation of the patient’s head must be adjusted, and the speculum must be positioned perpendicular to the canal and opened as wide as possible. Fig. 5.18 Mobility of the ossicular chain is checked using a needle. The malleus handle is gently pulled up to verify the integrity and mobility of the incudomallear complex. Fig. 5.19 In the case of fixation, the incus is removed with or without the malleus head. A different type of prosthesis is then used (see Major Discontinuity of the Incudostapedial Joint Stapes Useful, p. 90). The stapes fixation is checked. Facial nerve position and abnormalities are identified. The nerve might be partially or totally uncovered, protruding, or it may present anatomical variations. Adapted maneuvers or careful use of laser should be considered in such circumstances. Using a small, round knife or small hook, the incudostapedial joint is totally disarticulated. Pulling up the long process of the incus helps to locate the joint. The instrument slowly slices through the articulation using small rotational movements. Fig. 5.20 Tip: If the joint cannot be identified, pull the long process of the incus laterally with a small hook to reveal the exact position of the joint. The stapedial tendon is cut with straight microscissors or a diode laser (1.5 W in continuous mode). Section of the tendon exposes the posterior crus. Fig. 5.21 A diode laser is applied to cut the posterior crus in its inferior half. The protruding pyramidal eminence can be drilled using a Skeeter drill (Medtronic Xomed). A diamond or cutting microburr of 0.6–1 mm is utilized. Use of a diamond microburr minimizes bleeding. Fig. 5.22 Tip: A diode laser (808–940 nm) is a visible-spectrum laser. Its characteristics are similar to those of the KTP laser with high water diffusion inducing a higher theoretical risk of inner ear and facial nerve damage. Other types of laser other than the diode laser can be used. It is important to know the properties of each individual laser, as this helps to avoid complications. A diode laser has high water diffusion. It should be use on a dry surface to reduce heat diffusion. The anterior crus is generally hidden by the long process of the incus. Rotation of the patient’s head might facilitate visualization and allow its section using the diode laser. In the majority of cases, the anterior crus is identified by touching it with the laser probe. It is broken blindly. Fig. 5.23 Sometimes this step is not possible and the anterior crus is broken up by means of small left-to-right lateral movements of the superstructure with a needle or microhook. When the superstructure feels free, it is pushed onto the promontory to be removed using fine microforceps. Fig. 5.24 Normal appearance of the footplate, but with ligament ankylosis
Management of Ossicular Abnormalities
5__Management of Ossicular Abnormalities
Tympanoplasty Classification
Type 1 Tympanoplasty

Type 2 Tympanoplasty
Type 3 Tympanoplasty

Type 4 Tympanoplasty
Fixation of the Intact Chain
Malleus and Incus Fixation
Incus Removal
Malleus Head Removal
Malleus Tendon Cut
Stapes Fixation in Tympanosclerosis
Stapes Fixation in Otosclerosis
Stapes Surgery, Head Position
Transcanal Approach
Skin Incision
Skin Flap Elevation
Tympanomeatal Flap Elevation
Chorda Tympani Dissection
Chorda Tympani Mobilization
Posterior Tympanoatticotomy
Bony Frame Fracture
Atticotomy Optimalization
Placement of a Portmann Retractor
Checking Fixation of the Ossicular Chain and Facial Nerve
Malleus and Incus Mobility Testing
Malleus or Incus Fixation and Stapes Mobility Testing
Facial Nerve Position
Disarticulation of the Incudostapedial Joint
Removal of the Stapes Superstructure
Stapedial Tendon Cut

Posterior Crus Cut
Anterior Crus Cut
Stapes Superstructure Removal
Grade of Otosclerosis (according to Portmann and Guerrier 1986)
Grade I
Stay updated, free articles. Join our Telegram channel

Full access? Get Clinical Tree


