Fig. 2.1
Block diagram of the data acquisition and connection, through file conversion, with Matlab: a Corvis tonometer, b application OCULUS Corvis ST, c Matlab with the algorithm discussed in this monograph
Later in the monograph the operation of the algorithm individual parts was verified using the Operating System: Microsoft Windows 7 Version 6.1 (Build 7601: Service Pack 1) Java VM Version: Java 1.6.0_17-b04 with Sun Microsystems Inc. Java HotSpot(TM) 64-Bit Server VM mixed mode in Matlab Version 7.11.0.584 (R2010b) with Image Processing Toolbox Version 7.1 (R2010b). The PC computer was equipped with Intel Xeon X5680 @ 3.33 GHz with 12 GB of RAM.
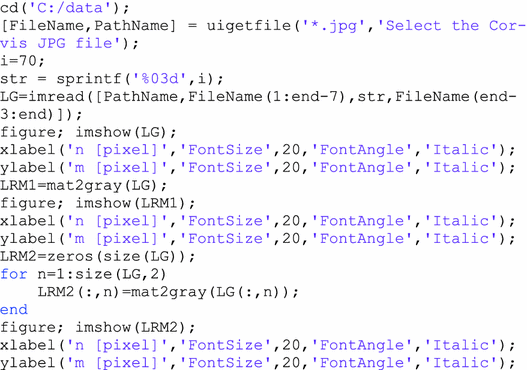
The last two data formats (*.avi and *.jpg) are most convenient for data processing. Loading and showing a sequence of images previously saved in the folder C:/data in *.jpg format to Matlab can be done using the following code:
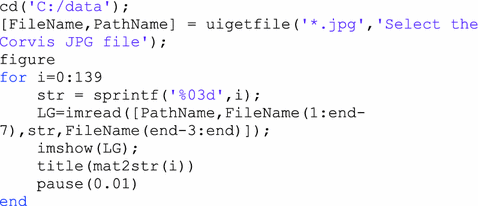
Function cd is designed to set the path, uigetfile function enables to open a dialog where the user can select any *.jpg file from the image sequence. The file selection is followed by sequential reading of successive jpg images from i = 0 to i = 139. With the use of sprintf function it is possible to convert the value i to an appropriate string form, “000” instead of “0”, “001” instead of “1” etc. Imread function enables to load the appropriate file to the matrix L G . Next, functions title and mat2str enable to show the image number in its header. With pause function it is possible to delay the loop operation due to the need to display individual images from a sequence.
In the case of *.avi file, the following notation can be used:
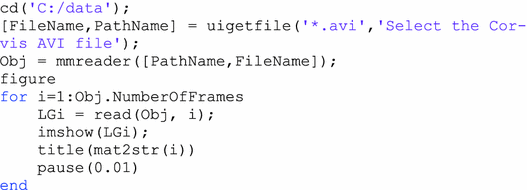
Function mmreader (aviread in older versions of Matlab) enables to download the movie file handle. Then read function allows for loading individual frames as 2D images.
In this loop, and also in the previous one, it is possible to perform three basic tasks useful for further analysis:
visualization of an image sequence—as it has been done in the presented source code,
saving an image sequence as subsequent files with the extension *.mat,
saving an image sequence as one file in the Matlab data format—*.mat.
The choice of the appropriate method depends on the direction of further analysis. As the essential elements in further analysis are the cornea and its contour, saving all the images on the disk in the form of one matrix is not necessary. Additionally, the creation of one matrix containing the full sequence of 140 images occupies in the Matlab space 16,128,000 bytes for data in uint8 format (M × N × I = 200 × 576 × 140 pixels). Compared to a single 2D image, it is 115,200 bytes in uint8 format (M × N = 200 × 576 pixels).
The subsequent images loaded into Matlab will be the variable L G . The notation L G (m, n), where m—row coordinates, n—column coordinates, will be used equally often. Later in the monograph, other variables will be indexed at the bottom in accordance with the notation of the following image matrices for subsequent analysis phases. In the notation of source codes in Matlab, subscripts and superscripts will be replaced with normal letters. In addition, readers who will not use the m-files added to the monograph should pay attention to too long strings which were divided between the text lines. This division is important because the division between the lines in the source code in Matlab is marked with an ellipsis “…”. However, it is not included in this monograph.
2.2 Image Filtration
Immediately after loading the image L G into Matlab, noise and small artefacts were filtered. Initial analyses confirmed that the greatest distortions, when taking proper care of the tonometer optics (its purity), are clusters consisting of no more than 3, 4 pixels. In this case, the median filter is the best option due to its characteristics, mainly the ability to remove impulse noise. The available function representing the median filter is medfilt2. In addition, the size of the mask h 1 is given, namely M h1 × N h1 . This is the size of the window within which the median will be calculated. Since, as mentioned earlier, distortions are clusters that do not exceed 4 pixels, the sufficient size of the median filter mask is M h1 × N h1 = 3 × 3 pixels—because 4 < (M h1 · N h1 )/2. In practice, this provides 9 pixels, from which the middle one is chosen after sorting. With imnoise function, it is possible to trace the relationship between the level of distortions (image L NO ) and the results obtained from median filtering—image L MED . For a sample image for i = 70 and the selected area, m ∈ ( 80, 120), n ∈ (80, 120):
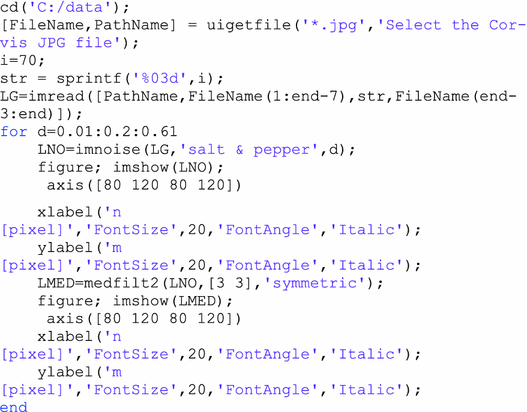
The value d is noise density and d ∈ {0.01, 0.21, 0.41, 0.61}. The results obtained can be traced in Fig. 2.2.
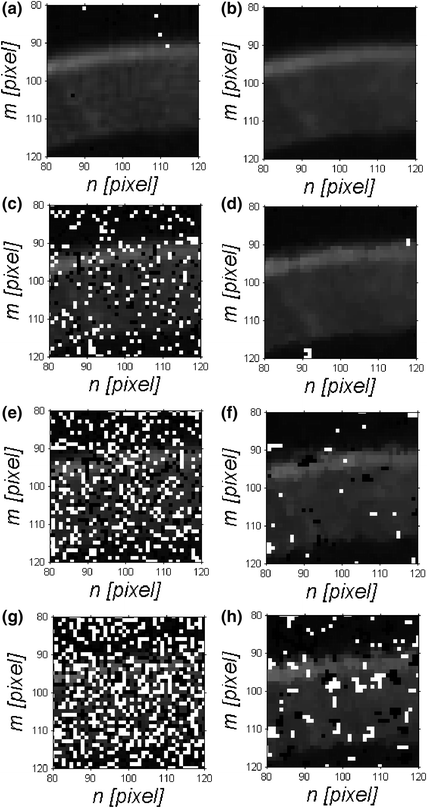
Fig. 2.2
Image sequence obtained for different d values (noise density) of noise added to the image L G . The following images show the portion of the image L NO with noise (first column) and the image L MED after median filtering (second column) for: a, b d = 0.01, c, d d = 0.21, e, f d = 0.41, g, h d = 61
The image sequence (presented in Fig. 2.2) obtained for different d values (noise density) of noise added to the image L G confirms, in all cases, the necessity and reasonableness of using the median filter. The next step of image pre-processing is normalization.
2.3 Image Normalization
Images L G coming from different human populations obtained under various conditions are characterized by various parameters relating to brightness. In general, these images have a histogram shifted towards the darker pixels. Therefore, it is necessary to carry out normalization. Image normalization can be carried out in two different ways:
normalization of the entire image to the range of brightness values from 0 to 1,
normalization of individual columns or rows to a range of brightness values from 0 to 1.
The function mat2gray, being a simplification of imadjust, will be used in both types of normalization. The following source code:
provides the results shown in the image in Fig. 2.3.
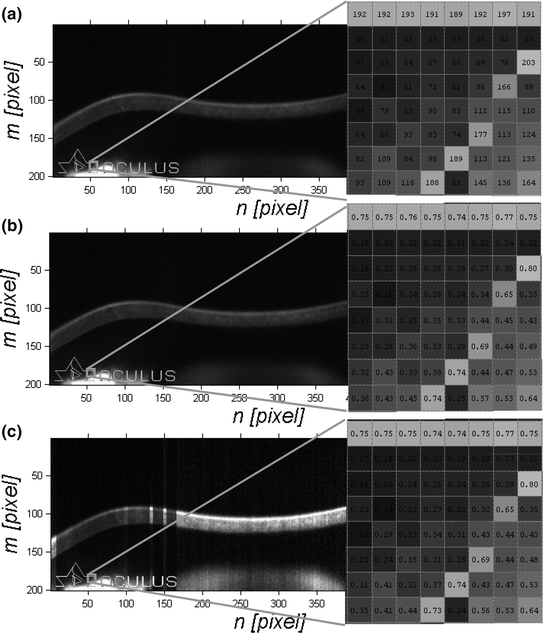
Fig. 2.3
Image L G (a) and images L RM after normalization with the first method (b) and the second method (c) as well as the zoom of their selected fragment
In general and also in the analysed case (Fig. 2.3), normalization with the first method is more often used. This is due to the fact that the relationships between pixels remain unchanged. Subsequent columns are modified in a linear manner. The results obtained with the second normalization method are much more impressive. However, their usefulness in practice, as will be shown in the following chapters, is smaller.
2.4 Histogram Equalization and Removal of Uneven Background
The next step is histogram equalization, partly related to the normalization discussed in the previous subchapter, and the removal of uneven background. Histogram equalization is reduced to the use of histeq function and the function intended to visualize the histogram, namely imhist. The results provided in Fig. 2.4 were obtained using the source code shown below.
 < div class='tao-gold-member'>


Only gold members can continue reading. Log In or Register to continue
Stay updated, free articles. Join our Telegram channel
Full access? Get Clinical Tree
